Add comments to your blog with Isso
Add comments to your blog with Isso

If you're not using a CMS like WordPress, chances are your CMS or blog engine doesn't support comments.

That makes sense if it's a static blog built with a tool like Hugo, Jekyll or Zola, but does less when your blog is powered by a database, like Ghost is.

I think comments are part of a blog and it's important to enable them. Readers can thank you for your work, report a mistake, discuss the article, etc.

Most of the time, you'll see blogs embedding Disqus threads (even on WordPres)... And it's bad.

Basically, you have all the disadvantages of centralized proprietary free service:

  • You don't own you comment: Disqus is gone, your comments are gone
  • Third party assets on your websites
  • Fat JS stuff to load the threads
  • Privacy issues: tracking and ads

That being said, it's convenient. And there are very few alternatives.

But let's fix that: let's use Isso.

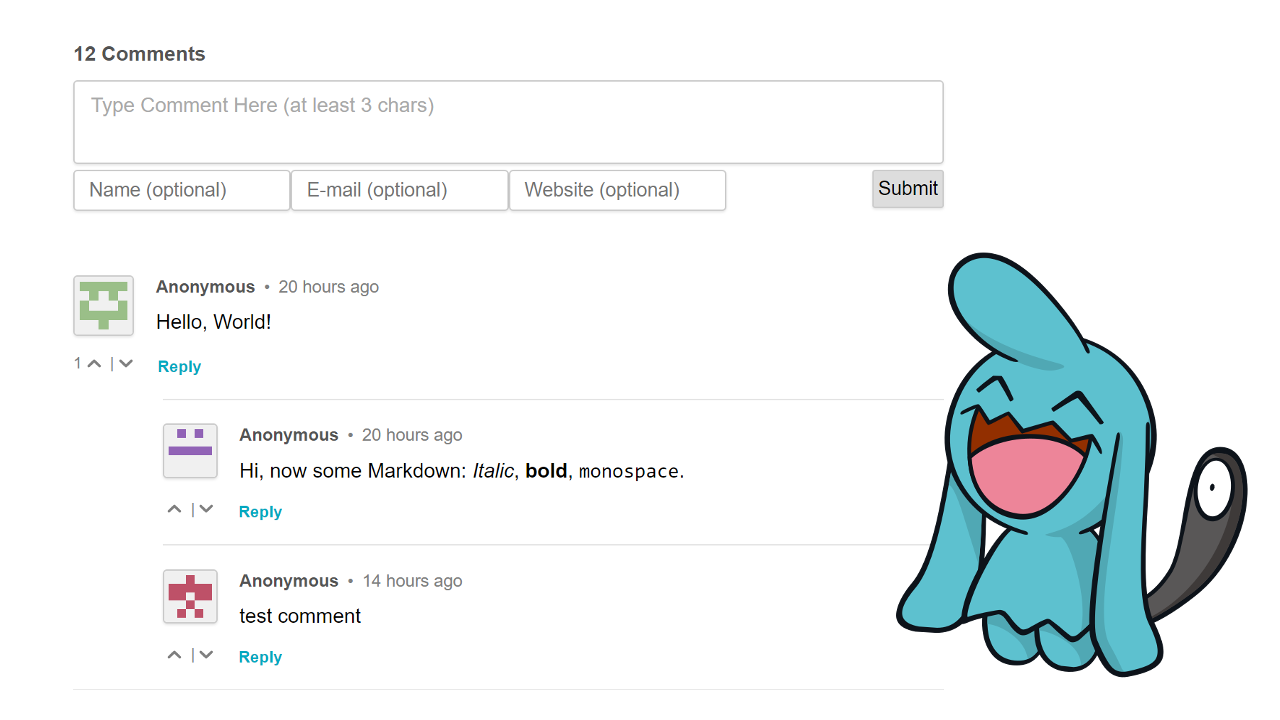
Isso is an Open Source commenting system written in Python, using a SQLite database. You embed it the same way as Disqus on your website, but this time it's a 18KB self-hosted JS file that doesn't track you... Nice, isn't it?
It does not even require an email nor username, and doesn't embed external services like Gravatar.

Installation#

The documentation does a great job covering the installation process.

Below is what you have to do to run Isso on Debian/Ubuntu.

Dependencies#

apt-get install python-dev python-pip sqlite3 build-essential

Add a user#

adduser isso --disabled-login --disabled-password

Install Isso#

Install isso as the isso user.

su - isso
pip install isso

Configuration#

Please read the documentation to know all available options.

As en exemple, here is the configuration I'm using for this blog (/etc/isso.conf):

[general]
dbpath = /var/lib/isso/comments.db
host = https://stanislas.blog/
max-age = 15m
notify = smtp
log-file = /var/log/isso.log

[moderation]
enabled = false

[server]
listen = http://localhost:8080
reload = off
profile = off

[guard]
enabled = true
ratelimit = 2
direct-reply = 3
reply-to-self = false
require-author = false
require-email = false

[smtp]
username =
password =
host = localhost
port = 25
security = none
to = <my email adress>
from = <isso at my fqdn>
timeout = 10

host equals to the websites where you want to embed Isso.

Systemd service#

Isso will be used as a daemon listening on port 8080. We can create a systemd service (among other init systems) to manage it easily and autostart it.

Add the service in /etc/systemd/system/isso.service:

[Unit]
Description=lightweight Disqus alternative

[Service]
User=isso
Environment="ISSO_SETTINGS=/etc/isso.conf"
ExecStart=/usr/local/bin/isso -c $ISSO_SETTINGS run

[Install]
WantedBy=multi-user.target

It's very simple and straightforward.

systemctl enable isso
systemctl start isso

Nginx reverse proxy#

We'll use a reverse proxy to setup Isso under a subdomain with HTTPS.

Install Nginx:

apt install nginx

Here is a example vhost (/etc/nginx/conf.d/isso.conf):

server {
        listen 80;
        listen [::]:80;
        server_name isso.angristan.xyz;
        return 301 https://isso.angristan.xyz$request_uri;

        access_log /dev/null;
        error_log /dev/null;
}
server {
        listen 443 ssl http2;
        listen [::]:443 ssl http2;
        server_name isso.angristan.xyz;

        access_log /var/log/nginx/isso-access.log;
        error_log /var/log/nginx/isso-error.log;

        ssl_certificate /etc/nginx/https/fullchain.pem;
        ssl_certificate_key /etc/nginx/https/key.pem;

        location / {
                proxy_set_header Host $http_host;
                proxy_set_header X-Real-IP $remote_addr;
                proxy_set_header X-Forwarded-For $proxy_add_x_forwarded_for;
                proxy_set_header X-Forwarded-Proto $scheme;
                proxy_pass http://localhost:8080;
        }
}

You can use acme.sh to get a Let's Encrypt certificate.

Using Isso on your website#

Just embed the Isso JS file. For instance, put this under your article:

<script data-isso="https://isso.angristan.xyz/" src="https://isso.angristan.xyz/js/embed.min.js"></script>
<section id="isso-thread"></section>

I'm using my own Ghost theme, so you can see how I embedded the code at the end of my <article></article> block.

Enjoy#

Well done! You own your comments again. Isso is super simple to install, and super lightweight. It integrates well with any websites, especially static and minimalist ones, so why not give it try?

Stanislas
Author
Stanislas
I like building things with code and computers

Comments

109Atom feed
Markdown supported
  1. Herv

    Thanks for sharing this!

    1. Myrkur

      Thanks for commenting in the new comment section :D

    2. inner

      innner to inner

  2. Anonymous

    Looks pretty cool, I assume you can make name and/or email required? Is there a way to a custom field if desired?

    1. StanislasAuthor

      Yes you can! Not that I know of, it would require you to modify the code and the DB scheme.

  3. Abhijith V

    how to embed the Isso JS file within my server! Where can I find those js files?

    1. John Biundo

      Hi, I realize this question is almost a year old! However, since a) this blog was very helpful in both exposing isso to me, and b) in helping me get it running, and this post ranks #1 in google for searching isso ghost, I thought I'd respond. The answer is actually interesting and simple, but not obvious. The script - which runs in the browser to render the comments - is downloaded form your isso server itself! So you embed the script tag as shown in this tutorial, and it downloads the js file from isso itself. I hope that makes sense. Bottom line: just include the script tag, and that's all you need. I don't think there's any other place where you can get the script, nor do you need to host it specifically in ghost or your reverse proxy.

  4. Akkarin

    Nice, I hope more sites will use this instead of Disqus.

    1. Topi Drama

      I also think so

  5. Boo

    Thanks for sharing

  6. Cương

    I followed your instruction. The comment form appeared on my blog, but when I tried typing some testing texts, and clicked the "send" button, nothing happened. Please help me with this.

  7. kanan

    Hello, have a problem when I start isso.service and check status, terminal return (code:exited; status 203/exec). You have a solution please ?

  8. Normcore

    Hi, I have found out about your Isso Docker image. After I pulled the image with my docker-compose.yml, do I still need to configure the Systemd file? Also I have some issues with the nginx config, my isso does not seem to work because of a 502 error.

    1. StanislasAuthor

      No, you manage via via docker-compose. Make sure to have a config file as described in the README.

    2. Normcore

      OK! Do you think it would work having the same docker-compose.yml file for Ghost and Isso?

    3. StanislasAuthor

      Yes, but you should have one docker-compose.yml per service.

    4. Normcore

      Angristan I manage to set up a Ghost install with Ghost, Isso, Nginx all 3 with Docker images (in the same docker-compose.yml though). I managed to add acme.sh but I need to test if it works to generate and install certificates. Quick question regarding Isso, do I need to chown my 2 volumes config/db or is it managed by the image? Thanks!

    5. StanislasAuthor

      You should not need too, but in case:

      chown 4242:4242 -R database/ config/
      
  9. Normcore

    Angristan, I would like to override one of the language files of Isso image with a local file because I want to tweak a few things in the translation. How can I do that in the docker-compose.yml? I thank the locale files are in /js/app/i18n Thanks!

  10. Mian

    Hi, Could we use http://localhost:80/ for example if both blog and isso is on the same server. That would not require nginx proxy and https then. I haven't tried it yet, thought to ask if possible.

    1. StanislasAuthor

      No because it's not the blog that accesses Isso, it's the clients.

    2. Mian

      Thanks. You are right. Its the client which need access over http etc.

  11. Normcore

    Out of curiousity have you activated the admin panel? Does it work? I added the option to my config file then recreated the Docker image (I use yours). I cannot access the panel admin. I mean, I can, but entering the password does nothing. Still on the login page.

    1. Normcore

      My issue is a bit different indeed. The only action I did was to enable admin and set a password in the isso.conf file, then I forces a rebuild with docker-compose. Before I open an issue, is there anything else I should have done? Thanks!

    2. Normcore

      Found it, the Isso documentation is not up to date. The password should be admin_password under [General]. This is weird you have this error basically you were my main source of information for Isso and I used your Docker image! The only change I had to do to make it work was to add 2 entries under general/host (the sub-URI and the main-URI).

  12. Scott

    Following this exactly but get 'Failed to load resource: the server responded with a status of 404 ()' on my WordPress site.

    Also when adding the nginx config I reload and it says:

    nginx: [warn] conflicting server name "isso.mydomain.com" on 0.0.0.0:80, ignored nginx: [warn] conflicting server name "isso.mydomain.com" on [::]:80, ignored

  13. John Biundo

    Nice work Stanislas! I appreciate the pointers. Nice blog too. Good luck with your studies.

  14. Anonymous

    Thanks for the post.

    Seems like there is also a docker image of Isso. Tho might take lot of fiddling to make it work.

  15. Toshiba Error Code eo4

    Thanks for the tips! Really appreciate it! Keep up the great articles! I’ll keep coming back to read them!

  16. Anonymous

    Very intersting

  17. Joseph Vidal-Rosset

    Bonsoir ou bonjour,

    Beaucoup de difficultés à installer un isso fonctionnel, et avec remark42 c'est encore pire... on comprend pourquoi Disqus a du succès... :(

    1. MaskyS

      Je suis d'accord avec vous! L'installation de Commento n'est pas si mal (et il vient avec d'autres avantages, comme une interface plus moderne), mais le systeme le plus facile a installer c'est utteranc.es. J'ai ecrit des guides pour l'installation des deux platformes, si vous etes interesse! (https://blog.maskys.com/installing-self-hosted-commento-onto-your-ghost-blog/ & https://blog.maskys.com/adding-utterances-github-issues-as-comments-to-my-ghost-blog/)

    2. Jhon Yao

      Commento a un interface plus moderner c' est vrai mais n'est plus supporté malheureusement avec des bugs énormes

  18. Solomon

    Nice article. Can the person commenting change their avatar?

    1. oktomus

      Yes, you need to specify your email and register on Gravatar :)

  19. oktomus

    Thanks for the tutorial Angristan ! Regarding the reverse-proxy part, I had to install php-fpm. Otherwise, I just had a 502 Bad Gateway error.

    1. StanislasAuthor

      That's weird, because php-fpm is not required here 🤔

    2. oktomus

      Indeed, I just checked and what I said is wrong. The problem I had was different :)

  20. Inept Tech moron

    Struggling so hard with this...

  21. Nino

    I have error when i try to run isso: ImportError: cannot import name 'SharedDataMiddleware' could you help me?

    1. Normcore

      I do not know if it is that but you have to downgrade the Werkzeug dependency from 1.0.0 to 0.16.1

  22. The Math Guy

    Can Isso support LaTeX ?

  23. Ian

    You have awesome posts I keep coming back to. Keep up the great content

  24. Utz

    Hi, nice explanation! Short question from a newbie . Did you changed also the Isso css files? I integrated Isso to my Ghost blog and it looks not really nice. The post itself uses 60% width, but Isso use full width.

  25. Cb

    Hello, I can't access isso.mydomain.com/admin using Nginx; location / { proxy_pass http://127.0.0.1:1234/; proxy_http_version 1.1; proxy_redirect default; proxy_set_header Host $host; proxy_set_header X-Forwarded-Host $host; proxy_set_header X-Forwarded-Server $host; proxy_set_header X-Real-IP $remote_addr; proxy_set_header X-Forwarded-For $proxy_add_x_forwarded_for; proxy_set_header X-Forwarded-Proto $scheme; }

  26. Hector

    Hey! Thanks for this, I was about to rollout my own discourse server to have self-hosted comments, and have to handle authentication, security, etc. This is way better and cleaner, but how does it handle spam?

    1. StanislasAuthor

      There are some built-in (very light) securities, but I haven't received much spam, if any, during all these years.

  27. CosmicIce

    Thank you so much! :D

  28. lee

    thank you so much.Systemd service is very useful for me.

  29. Sifatullah

    You have marvellous posts I continue to return to. Keep up the extraordinary substance. More

  30. Blake

    I will try this out!

  31. serg

    Quite interesting, indeed. Does it support markdown, seems like it does duck

  32. serg

    On the client, can you "authorize" user automatically when they are already authenticated by your web site auth system?

    1. Serg

      Thanks! Good to know!

  33. serh

    can you post comment without user name?

    1. StanislasAuthor

      Yes! I disabled this option but otherwise you would be able to leave the field empty and it would mark the comment as "Anonymous"

  34. Ava Vance

    this is a test comment

  35. stíobhart

    How on earth did you get Gravatars working with Isso? I've been wanting to have something like this but thought I'd have to fork the project and hack it myself to do so. Especially since the dev makes a point of saying Isso doesn't and won't work with custom avatars.

    BTW: I've also written a howto on installing Isso. This time using Caddy webserver and Hugo static site generator. Mine is here:

    https://stiobhart.net/2017-02-24-isso-comments/

  36. AZ

    Hmm I managed to make it work halfway I am able to see the input boxes but not able to comment anything when I click on subnit. I'm gonna tinker a bit more.

    1. StanislasAuthor

      Take a look at your browser's developer tools, you'll see what error is occurring.

  37. Hungryhungryhugo

    Really cool, I am not going to lie. Great post!

  38. Testingcomments

    Awesome!

  39. JC

    Great tutorial, Thanks

  40. Anonymous

    I am trying to use this with mkdocs-material. However I have included the script tag but it does'nt seem to work

  41. Adrien

    FYI your update is 'updage" haha

  42. Joet

    Great article, and is there any support for attachment drop in? and if so, can the attachment get sent as part of the email? Thanks!

  43. Veesar

    Thanks! How do we change the placeholder for the fields? I've changed the Name field to required, but it still shows "Name (optional)" in the field's placeholder.

  44. Pflegecraft

    Can you make please a Update Tutorial for Install Isso... i have Keyhelp and i can not Install Isso i came a 500er Error... :(

    And i think not waht else...

    sorry i came from Germany :(

  45. Xavi

    Interesting! Will take a look. I wonder how can you deal with bots, though.

  46. Testing

    Hey, this is cool!

  47. Joe

    Nice! Now I just need to edit the CSS so it works properly with a dark themed website. Do you have any idea how to do this?

  48. Foo

    How do I set my avatar here ?

  49. jack doe

    kickass blog, stanislas! thanks for the help

  50. Fart Mode

    Thanks the the tutorial, mate! I'm planning on setting it up for my blog soon. I assume the majority of my readers would stray away from using Gravatar and I'm not fond of the generated avatars that come with Isso; I assume I could replace them with a handful of images?